Elavon Connector Account
- Choose the
 icon, enter Payment Connector Accounts, and choose the related link.
 - Choose the New action.
- Enter an Account Id. The Account Id can be anything you wish to refer this Payment Connector Account profile to and it can be changed later.
- Choose your provider from the Payment Connector drop down list.
- Choose OK when done.
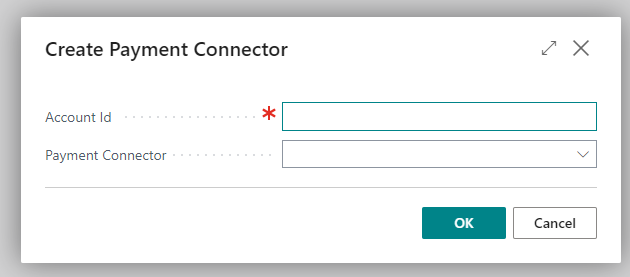
You will then be prompted to enter further information:
|
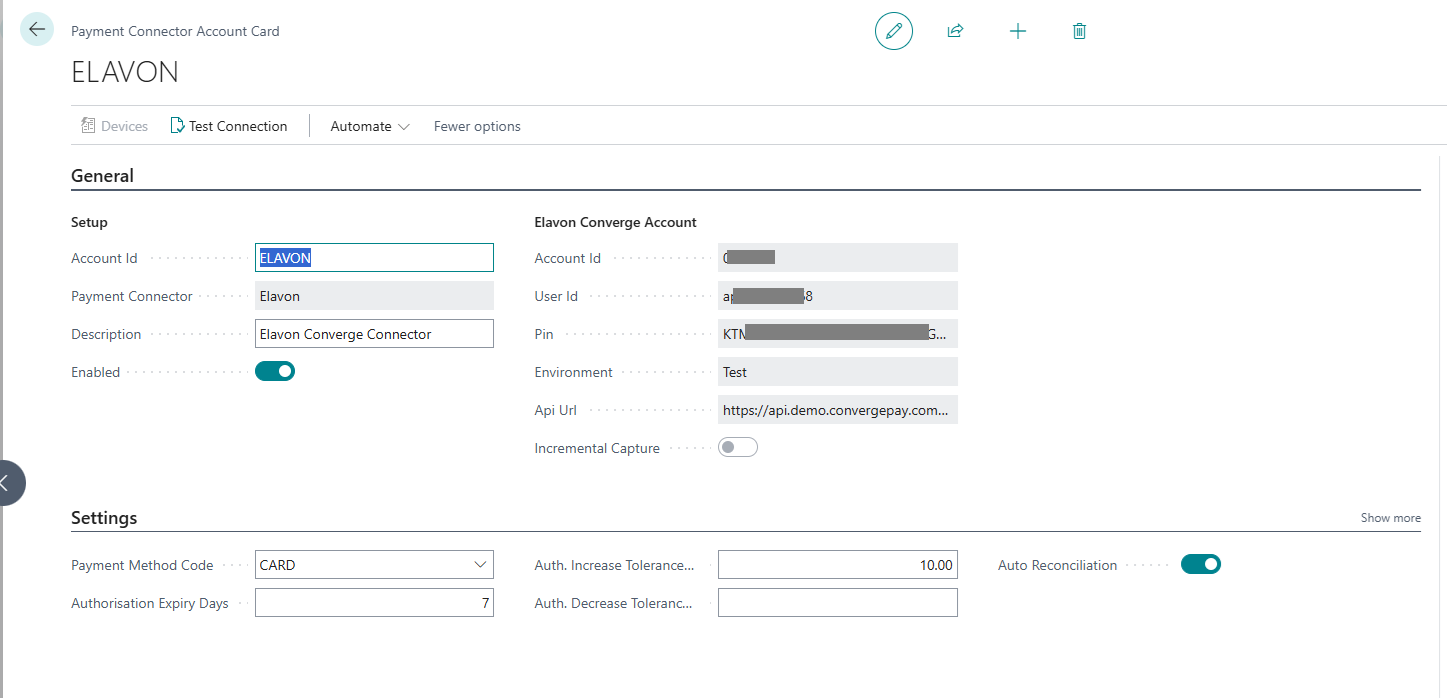
Account Id |
Text indicator for this account. This can be anything that fits the business. |
|
Payment Connector |
Select the Payment Connector from the dropdown. This is the Payment Provider to use. |
|
Description |
Text description for this Payment Connector Account |
|
Enabled |
This flag enables and disables this connector. Enable this once you have completed all the requisite information. Read and if you agree to the EULA, continue. The connector must be disabled before you can make changes. |
|
Settings |
|
|
Payment Method Code |
Select the Payment Method in Business Central you wish to be associated with Payments for this given provider, e.g. “CARD” To define a code, visit Payment Methods |
|
Authorization Expiry Days |
Enter the number of days that the provider recommends that an Authorization is valid for, for instance, this is typically 7 days but may be more. |
|
Auth. Increase Tolerance % |
Enter the percentage that your Merchant account allows for an increase in the original authorization. |
|
Auth. Decrease Tolerance % |
Enter the percentage that your Merchant account allows for a decrease in the original authorization by (e.g. 10, 100). |
|
Auto Reconciliation |
Select Yes |
|
Elavon Converge Account |
|
|
Account ID |
Enter the Account ID as provided by Elavon |
|
User Id |
Enter the User id as provided by Elavon |
|
PIN |
Enter the PIN as provided by Elavon |
|
Environment |
Select Test or Production |
|
Api Url |
Test: https://api.demo.convergepay.com/VirtualMerchantDemo/processxml.do Production: |
|
Incremental Capture |
Incremental Capture supports a single Authorization and multiple captures. Select Enable to enable Incremental Capture. Elavon must support this feature and the Merchant Account must be setup to support this. Check with Elavon. |