POS Installation
This topic covers installing Retail Modern POS ready for use with Labels. Retail Realm supply a customized MPOS package that includes the standard MPOS functionality along with the MAX Essentials customization extensions ready to start printing labels out of the box.
Please check with your systems administrator before applying any Retail Realm MPOS packages to ensure compatibility.
Prerequisites
It is vital that any previous version of Retail Modern POS is uninstalled and completely removed from the device, prior to commencing
Please check that there are no files existing in the following folder C:\Program Files (x86)\Microsoft Dynamics 365\70\Retail Modern POS |
Installation Procedure
Step1
Flag the target POS device for Activation
Navigate to: Retail and commerce > Channel setup > POS setup > Devices
Edit the target device
Set Activation status to Pending
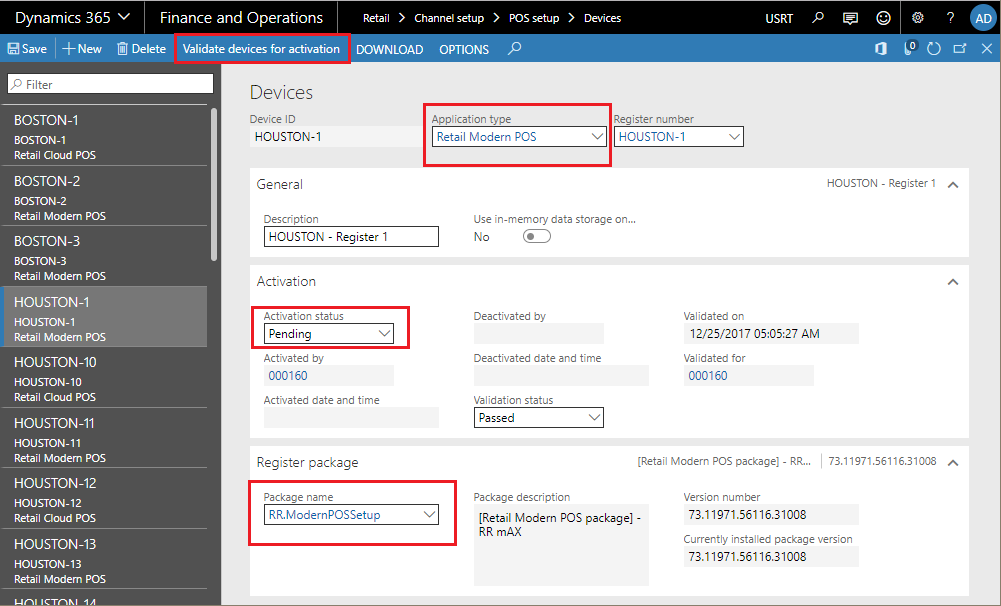
Then Click Download and choose RR.ModernPOSSetup.
This will download the Retail Realm version of the MPOS setup.
Once downloaded, right click on RR.ModernPOSSetup.exe and select Run as Administrator
Accept any defaults and continue and complete the installation.
DLLHost.exe.config file configuration
Navigate to:
C:\Program Files (x86)\Microsoft Dynamics 365\70\Retail Modern POS\ClientBroker
Open the file DLLHost.exe.config in Notepad
Update the AADClientId and AADRetailServerResourceId as shown below:
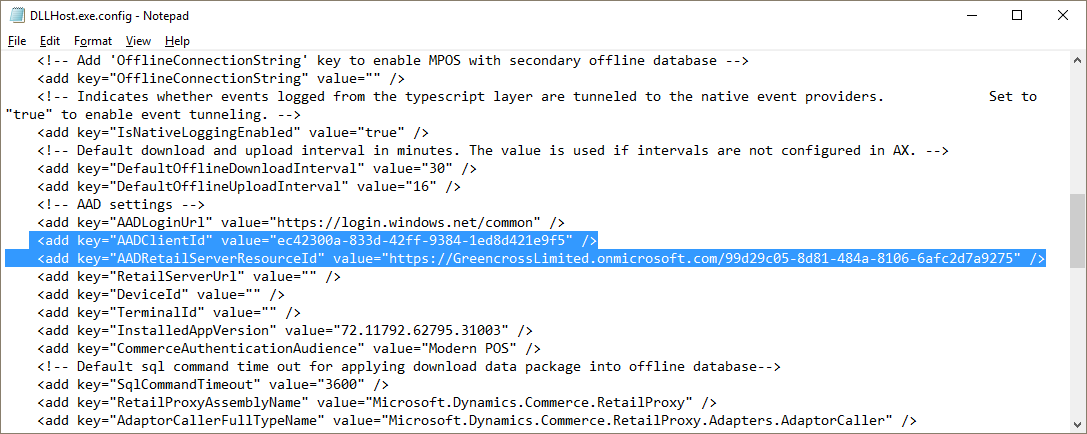
Refer to this Microsoft article for further guidance:
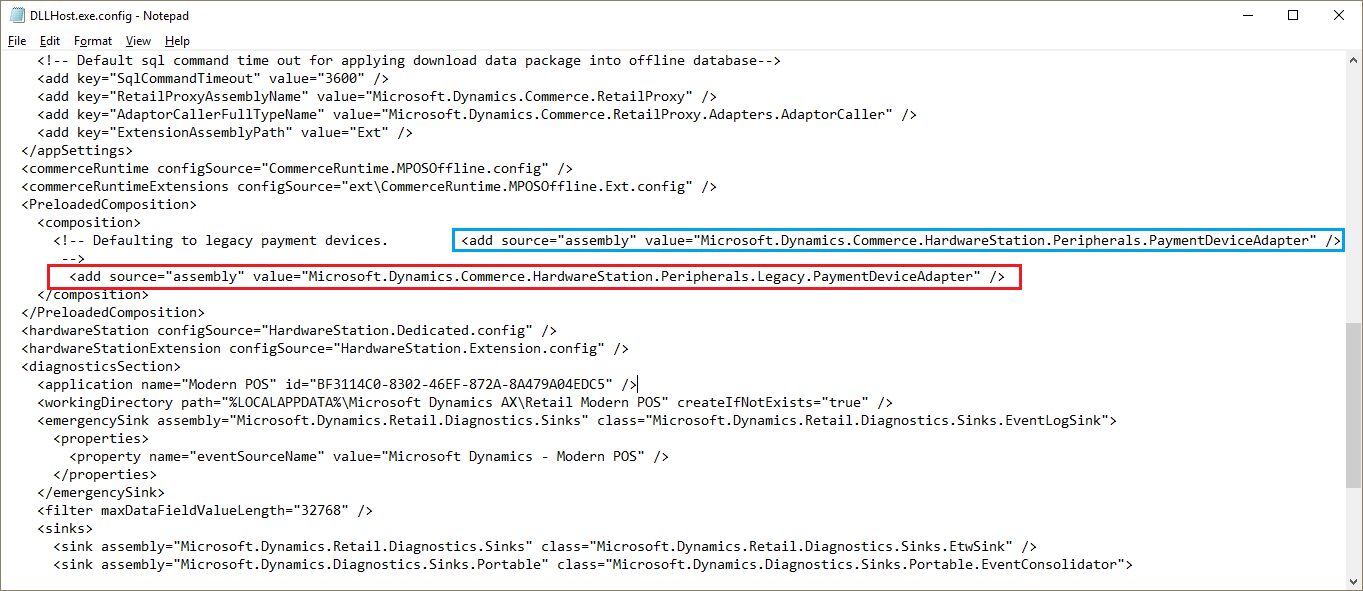
After completing the above AAD steps, add the reference in the same file (after the legacy payment devices comment section) as shown in below screenshot (copy the reference marked with blue and paste to the section marked with red)
NOTE: You can keep the <add source="assembly" value="Microsoft.Dynamics.Commerce. HardwareStation.Peripherals.Legacy.PaymentDeviceAdapter" /> in comment section.
Updated DLLHost.exe.Config
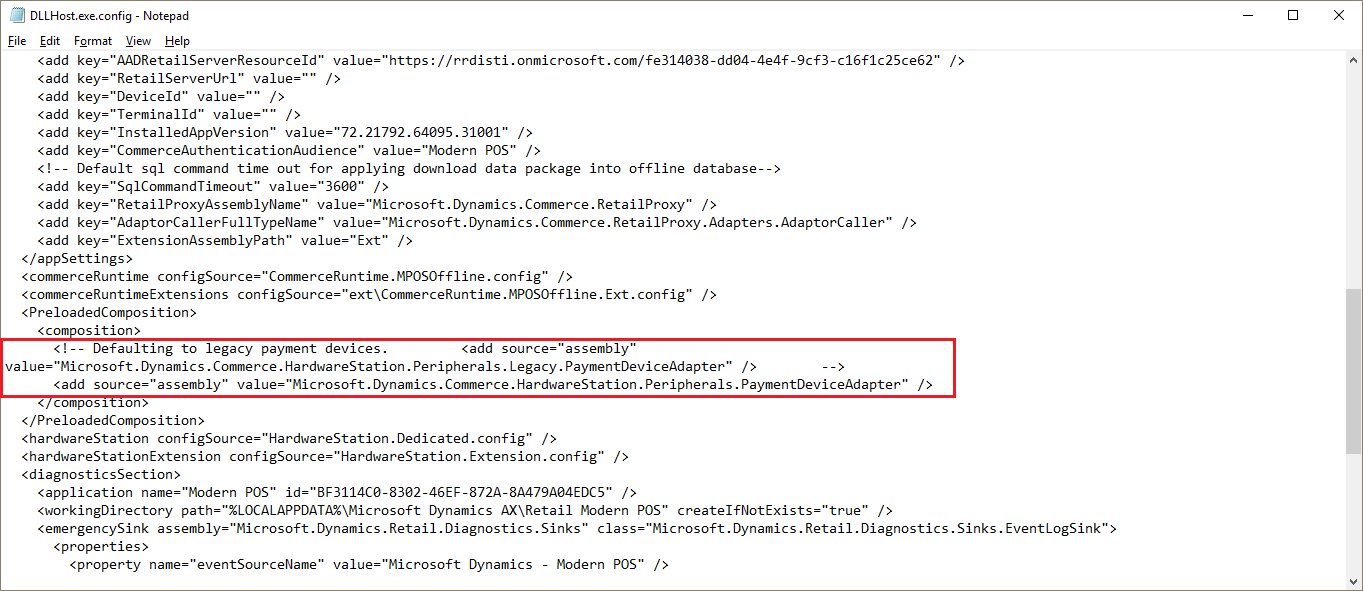
Save the changes and close the file.
Activating the POS
Open Retail Modern POS
Modern POS will prompt you to perform the standard Device Activation.
Follow the on-screen prompts
Use the Store and Register that was previously flagged as Pending.
You will require the Activation URL – please consult with your systems administrator
This is NOT given or determined by Retail Realm!
Logging into Retail Modern POS for the first time
- Start Retail Modern POS
- Enter the Cashier UserID and Password
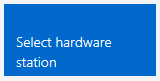
- Click Hardware Station
- Click Manage
![]()
- Turn it ON as shown:
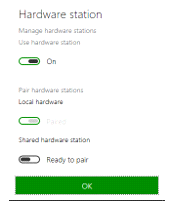
Click OK
Logging in and Out of POS Client.
Create POS Operations:
This section guides you though creating a button on MPOS to print a label
Navigate to Retail > Channel setup > POS setup > POS > POS operations
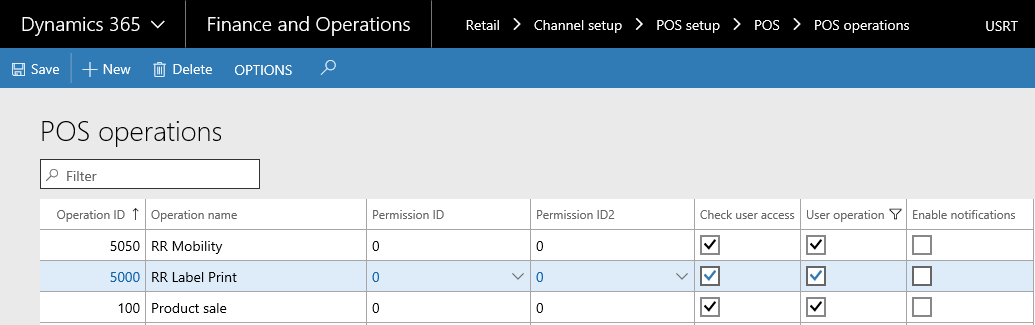
Field |
Description |
Operation ID |
Enter 5000 as the operation ID. |
Operation name |
You can enter any operation name. e.g. "MAX Essentials: Print Labels" |
Permission ID |
Leave this as the default value 0 |
Permission ID2 |
Leave this as the default value 0 |
Check user access |
Click to check this checkbox |
User operation |
Click to check this checkbox |
Enable notification |
Do not check this checkbox |
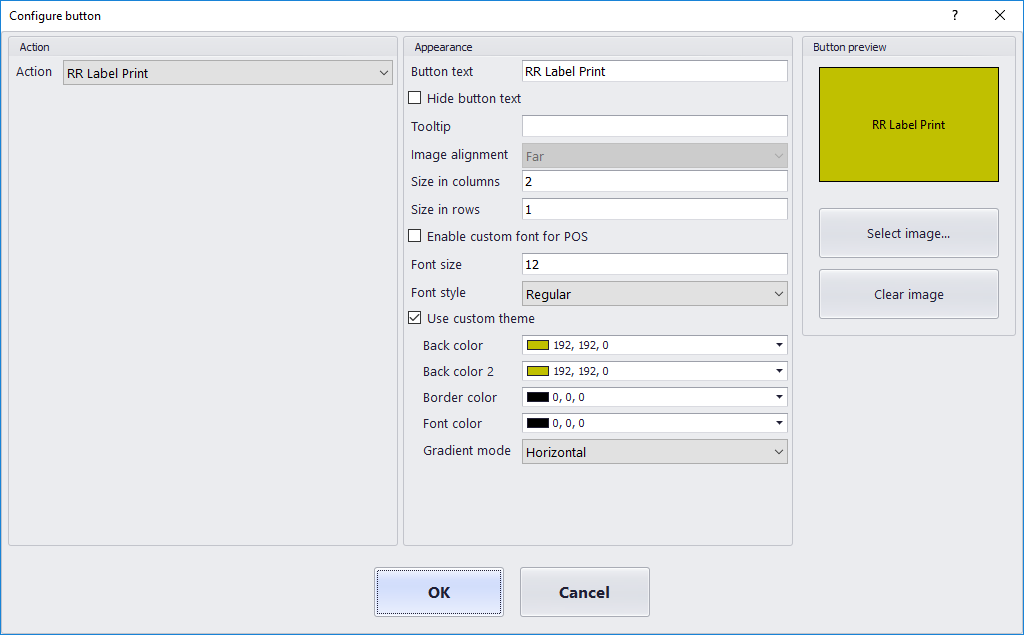
Add this Operation to respective screen layout of POS.
Once you added the operation to POS layout, sync the data to store using Job 1070 Channel configuration and 1090 Register.