Using Labels at POS
Print Label for an Item:
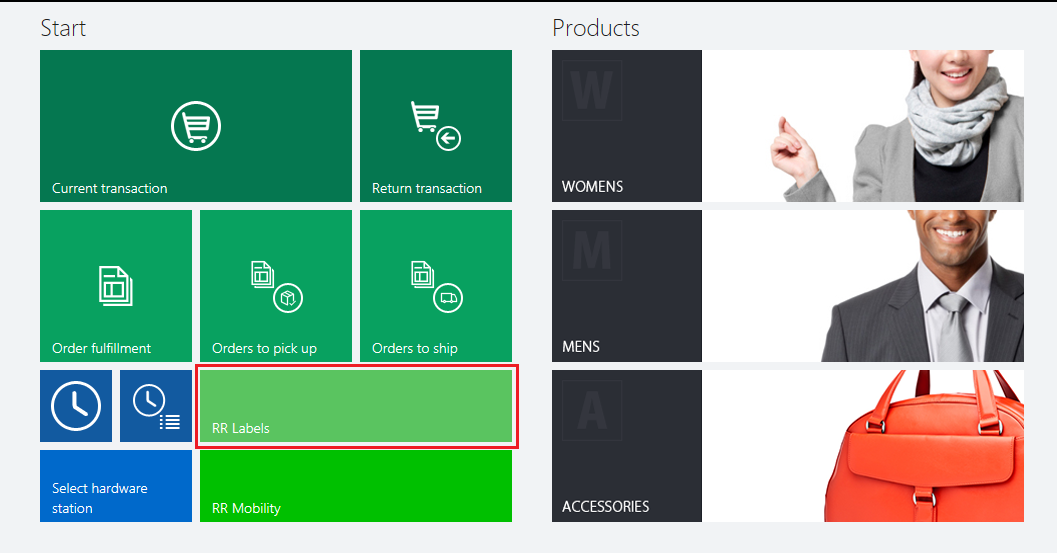
Once you logged in to MPOS, it will display you Label button which you have already create in POS Operations section.
Once you clicked on RR Labels button, it will display you below screen.
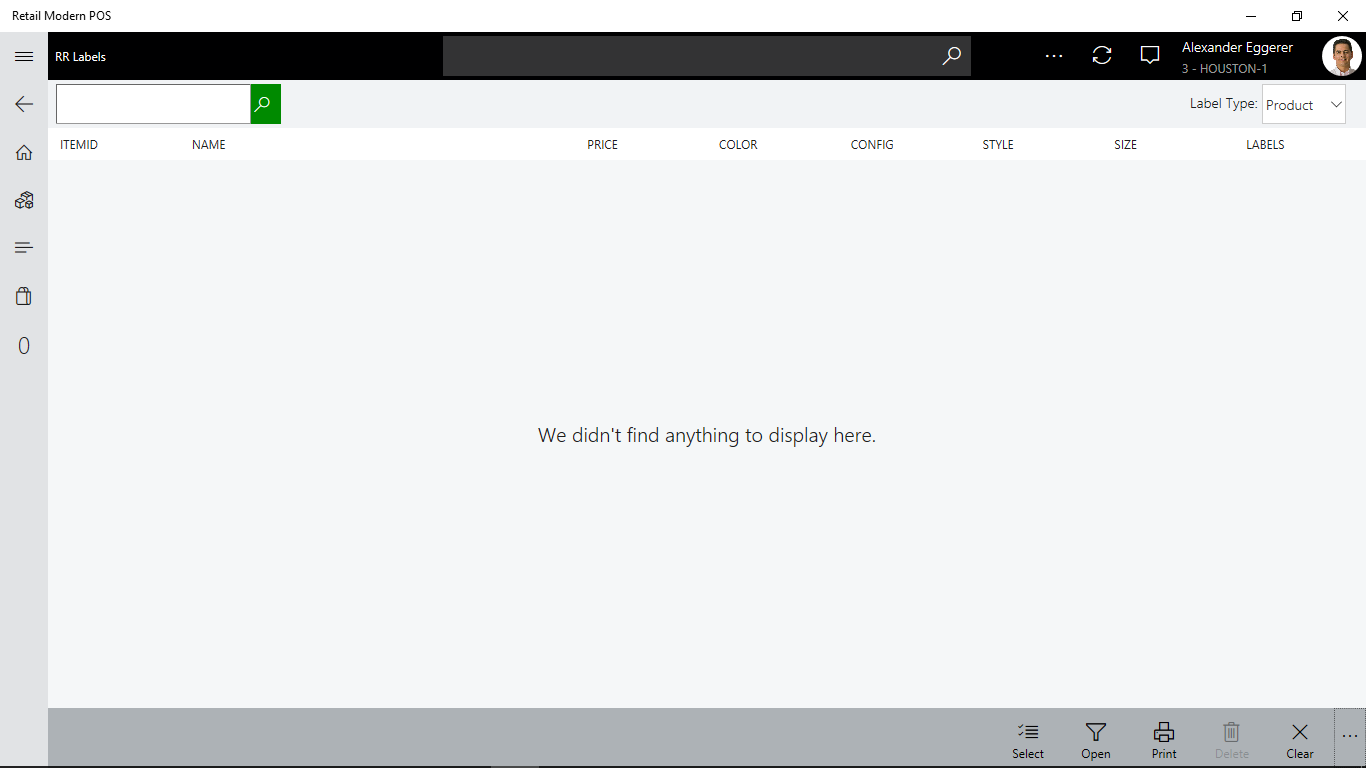
Buttons |
Description |
Select |
It will select the record from grid. |
Open |
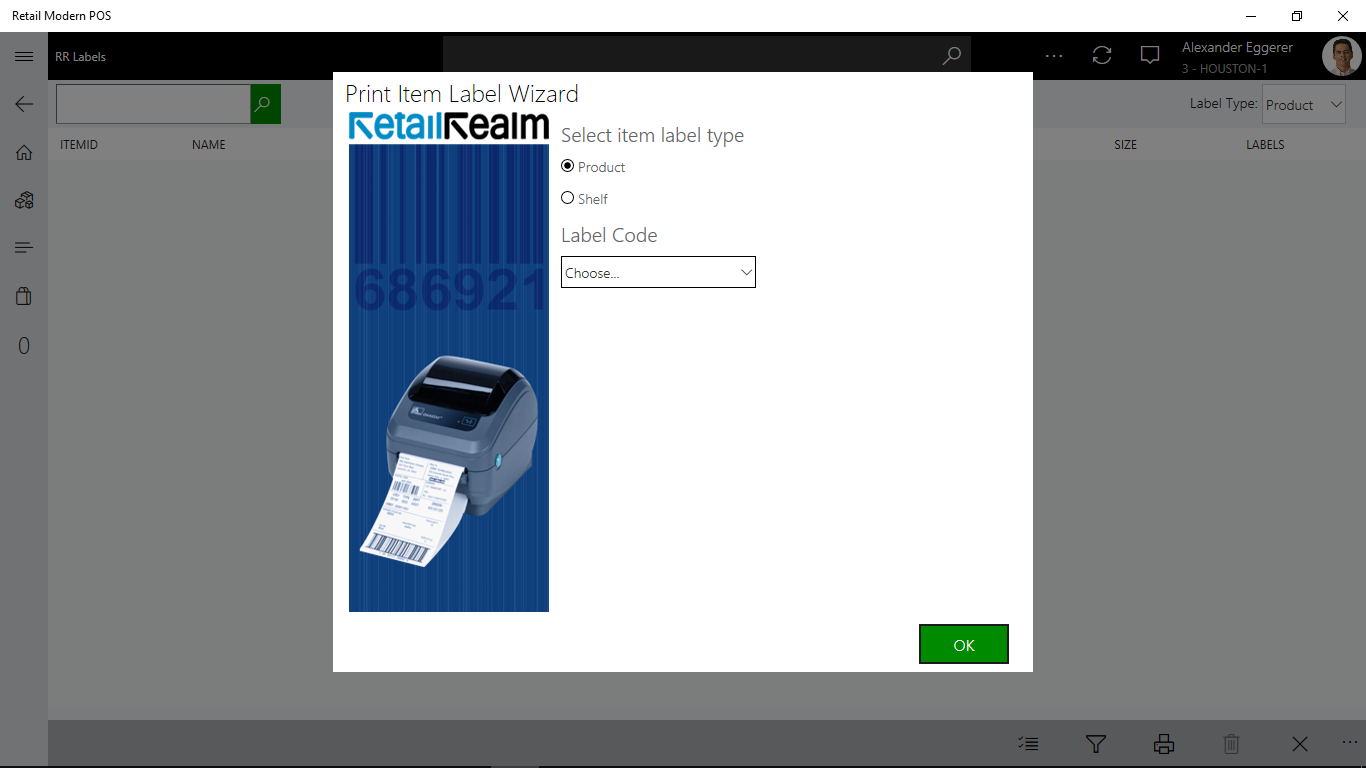
Once you clicked on Open button, it will open Print Item label wizard. User can scan item to print label from here. |
Select Label Item from Grid and click on Print button to Print Label for selected item. |
|
Delete |
It will delete label item from grid. |
Clear |
It will clear the list. |
We will check above features in more details.
Open
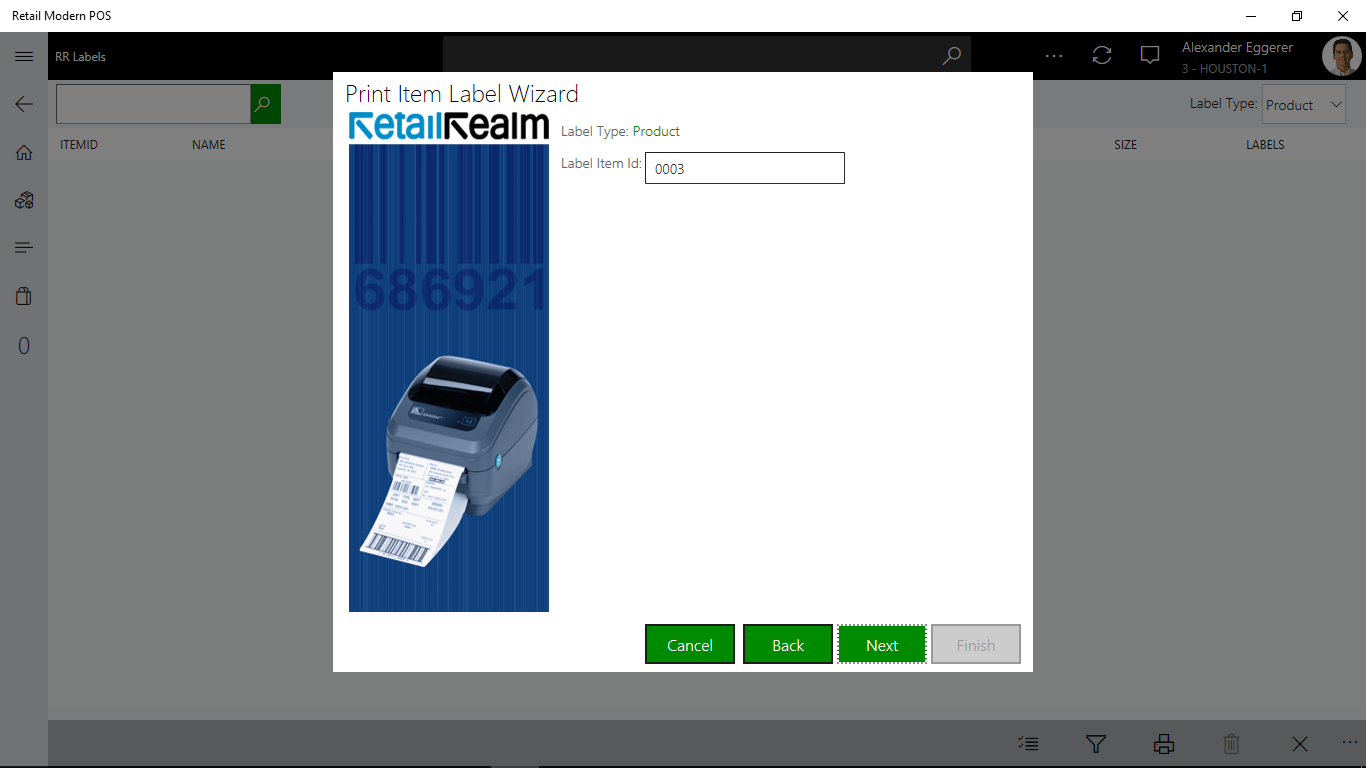
Once you click on Open button it will display below screen.

For example now we are selecting Item filter and clicking on Next button, once you clicked on Next it will display below screen

Enter the Label Item Id which you have configured for Label print, once you enter Label item id it will enable Next button
Click on Next button, it will display below screen.
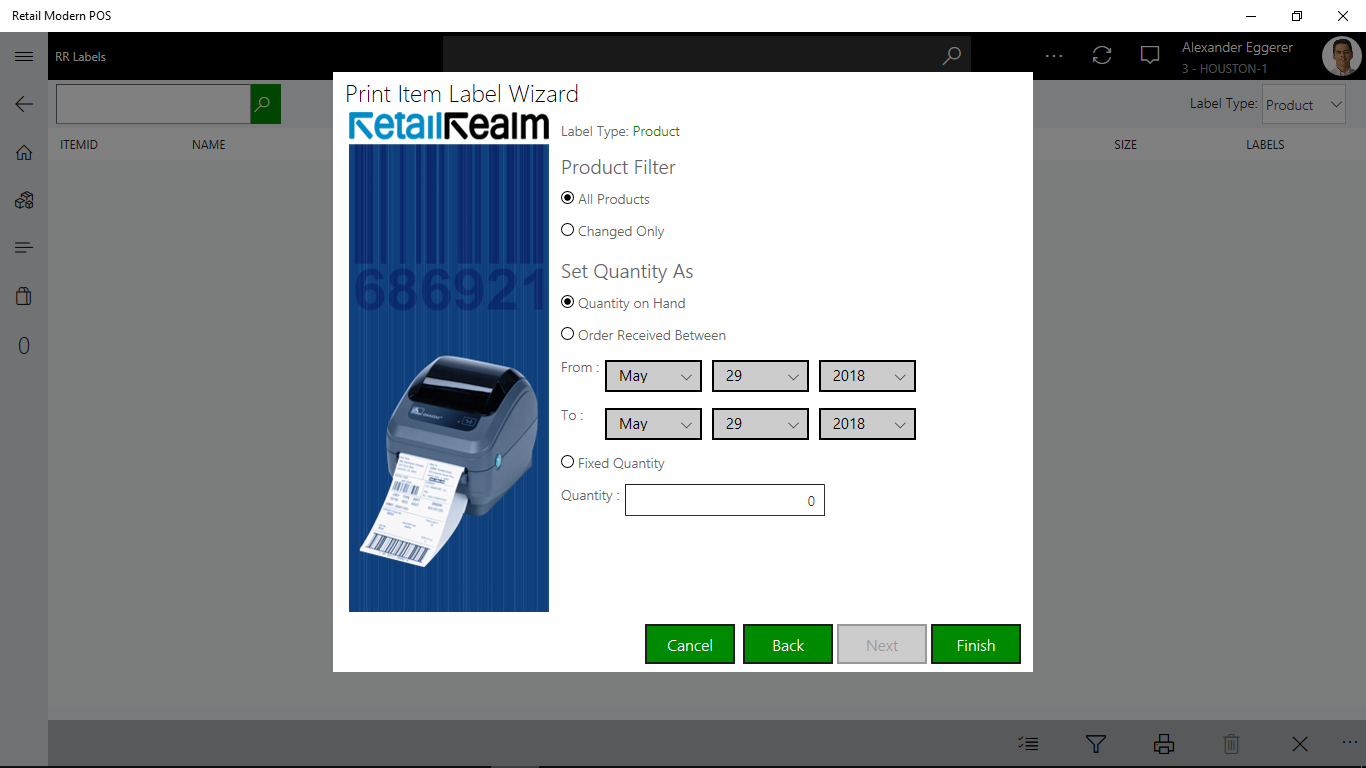
Product Filter |
Description |
All Products |
If Product filter set to All Products then it will consider all the configured label product for Print. |
Changed Only |
If Product filter set to Changed only then it will consider label product whos quatity is updated recently. |
Set Quanity as |
Description |
Quantity on hand |
If Set Quantity as “Quantity on hand” then it will print the label for all quantities which are available in Quantity on hand in item inventory. |
Order received between |
If Set Quantity as “Order received between” then it will print the label for quantites which are received between from and to date using purchase order. |
Fixed quantity |
If Set Quantity as “Fixed quantity” then it will print the label for entered quantity. |
Now I am selecting option Fixed Quantity and entering quantity as 5 then finish button will be enabled. Once you clicked on Finish button it will display below screen.
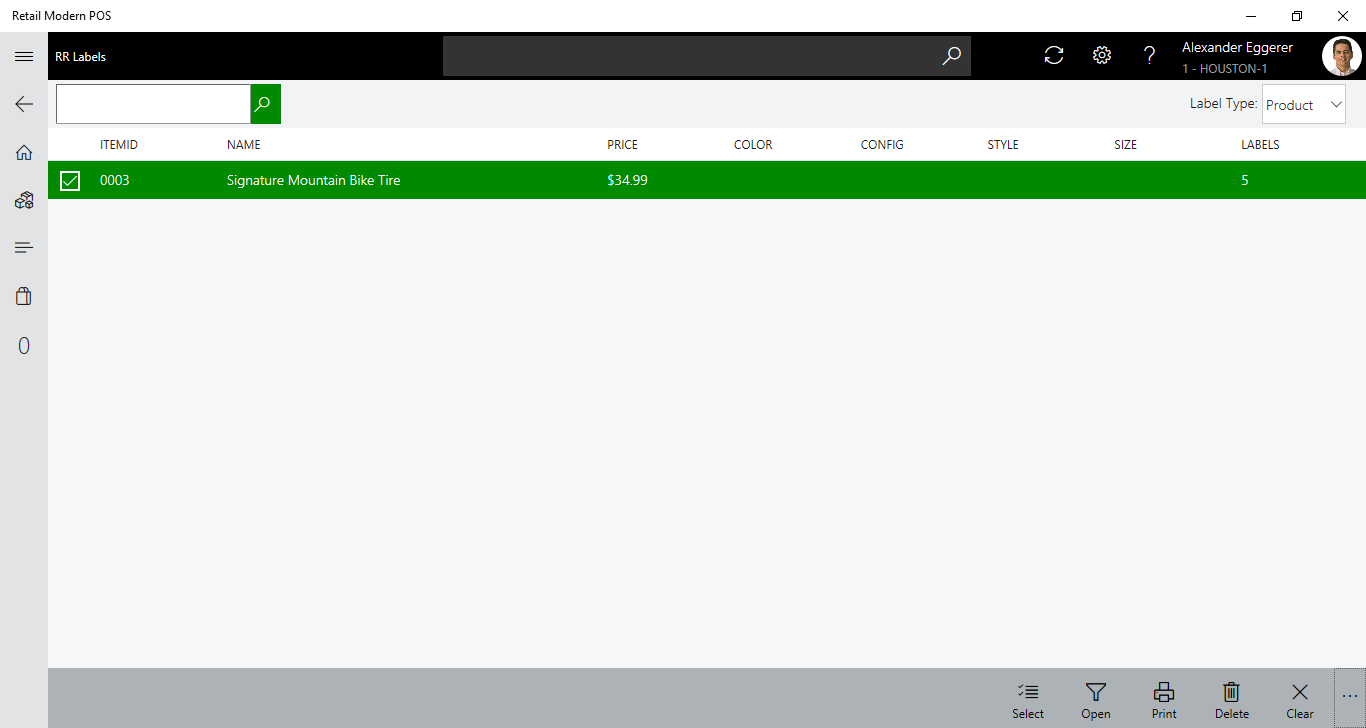
User can select item using Select button, once you select item then delete operation can be done for selected item.
Once you click on Print button it will display below screen.
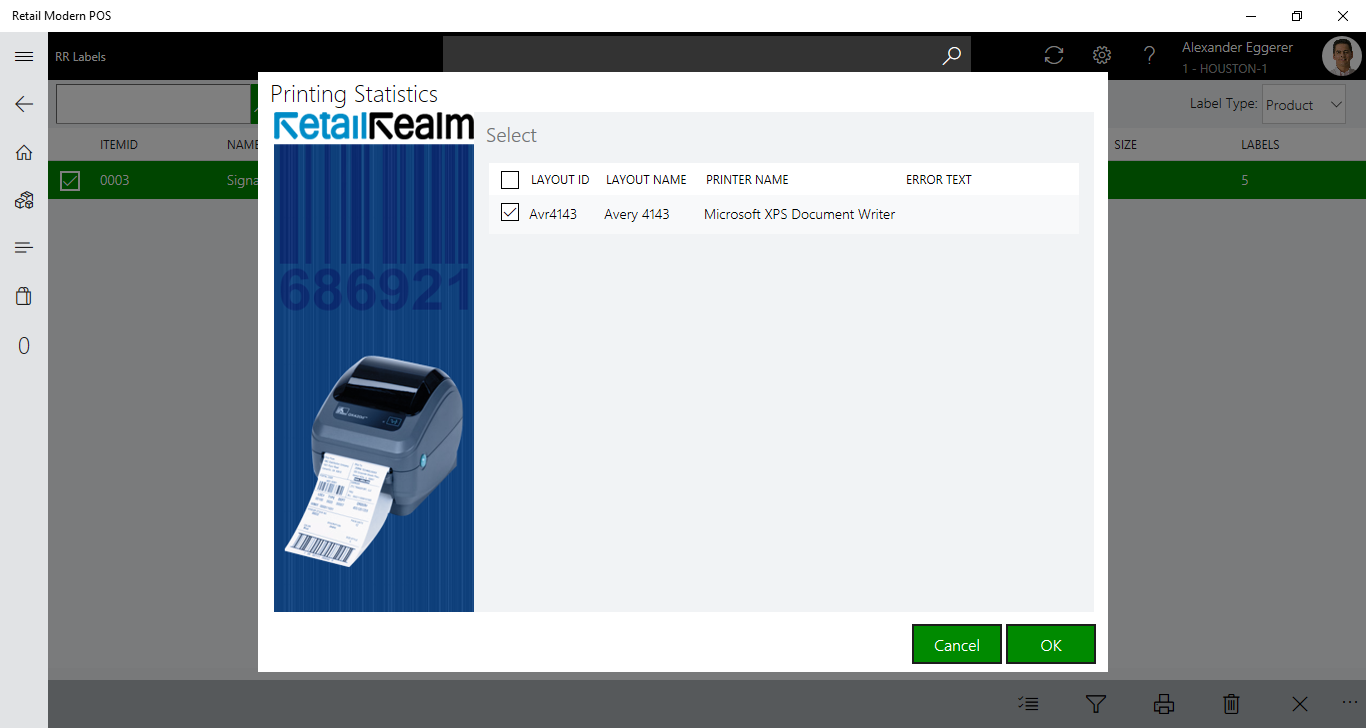
Click on OK button to print the label.
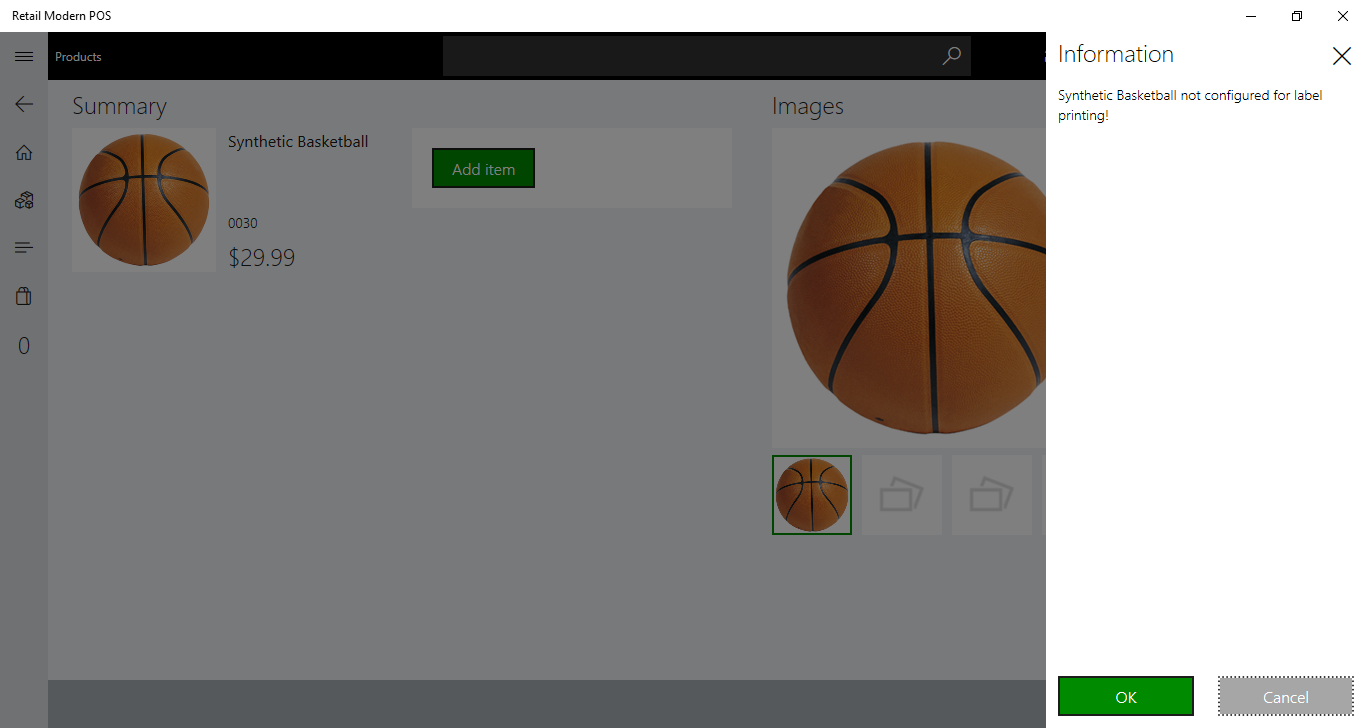
If Label item is not configured in AX and user is trying to print label at POS then it will display below screen.